My house has some 1980s era wood panels with dado rails and built-in shelves. The trendy thing at the moment is to rip that out and paint everything white or in muted matte colours. Some of it isn’t in super great shape…
The Problem
I have ~10 years of deferred maintenance on this house to complete. The wood panels aren’t a priority, so they’ll be sticking around. All of the various gouges are making them look awful.
The Solution
I’ll make them look a little nicer until I can deal with everything in a cohesive manner.
Materials Used
- Stainable wood filler (Lepage Wood Filler in Light Oak)
- Sandpaper with sanding block (150 to 120 grit is good)
- Oil-based pencil crayons with high pigmentation (Lyra Rembrandt Polycolor)
- Oil (I used Jojoba oil, but many others are suitable for wood)
- Workable fixative (Krylon Workable Fixatif)
- Masking tape (to protect other surfaces from the fixative)
- Plenty of drawing skill
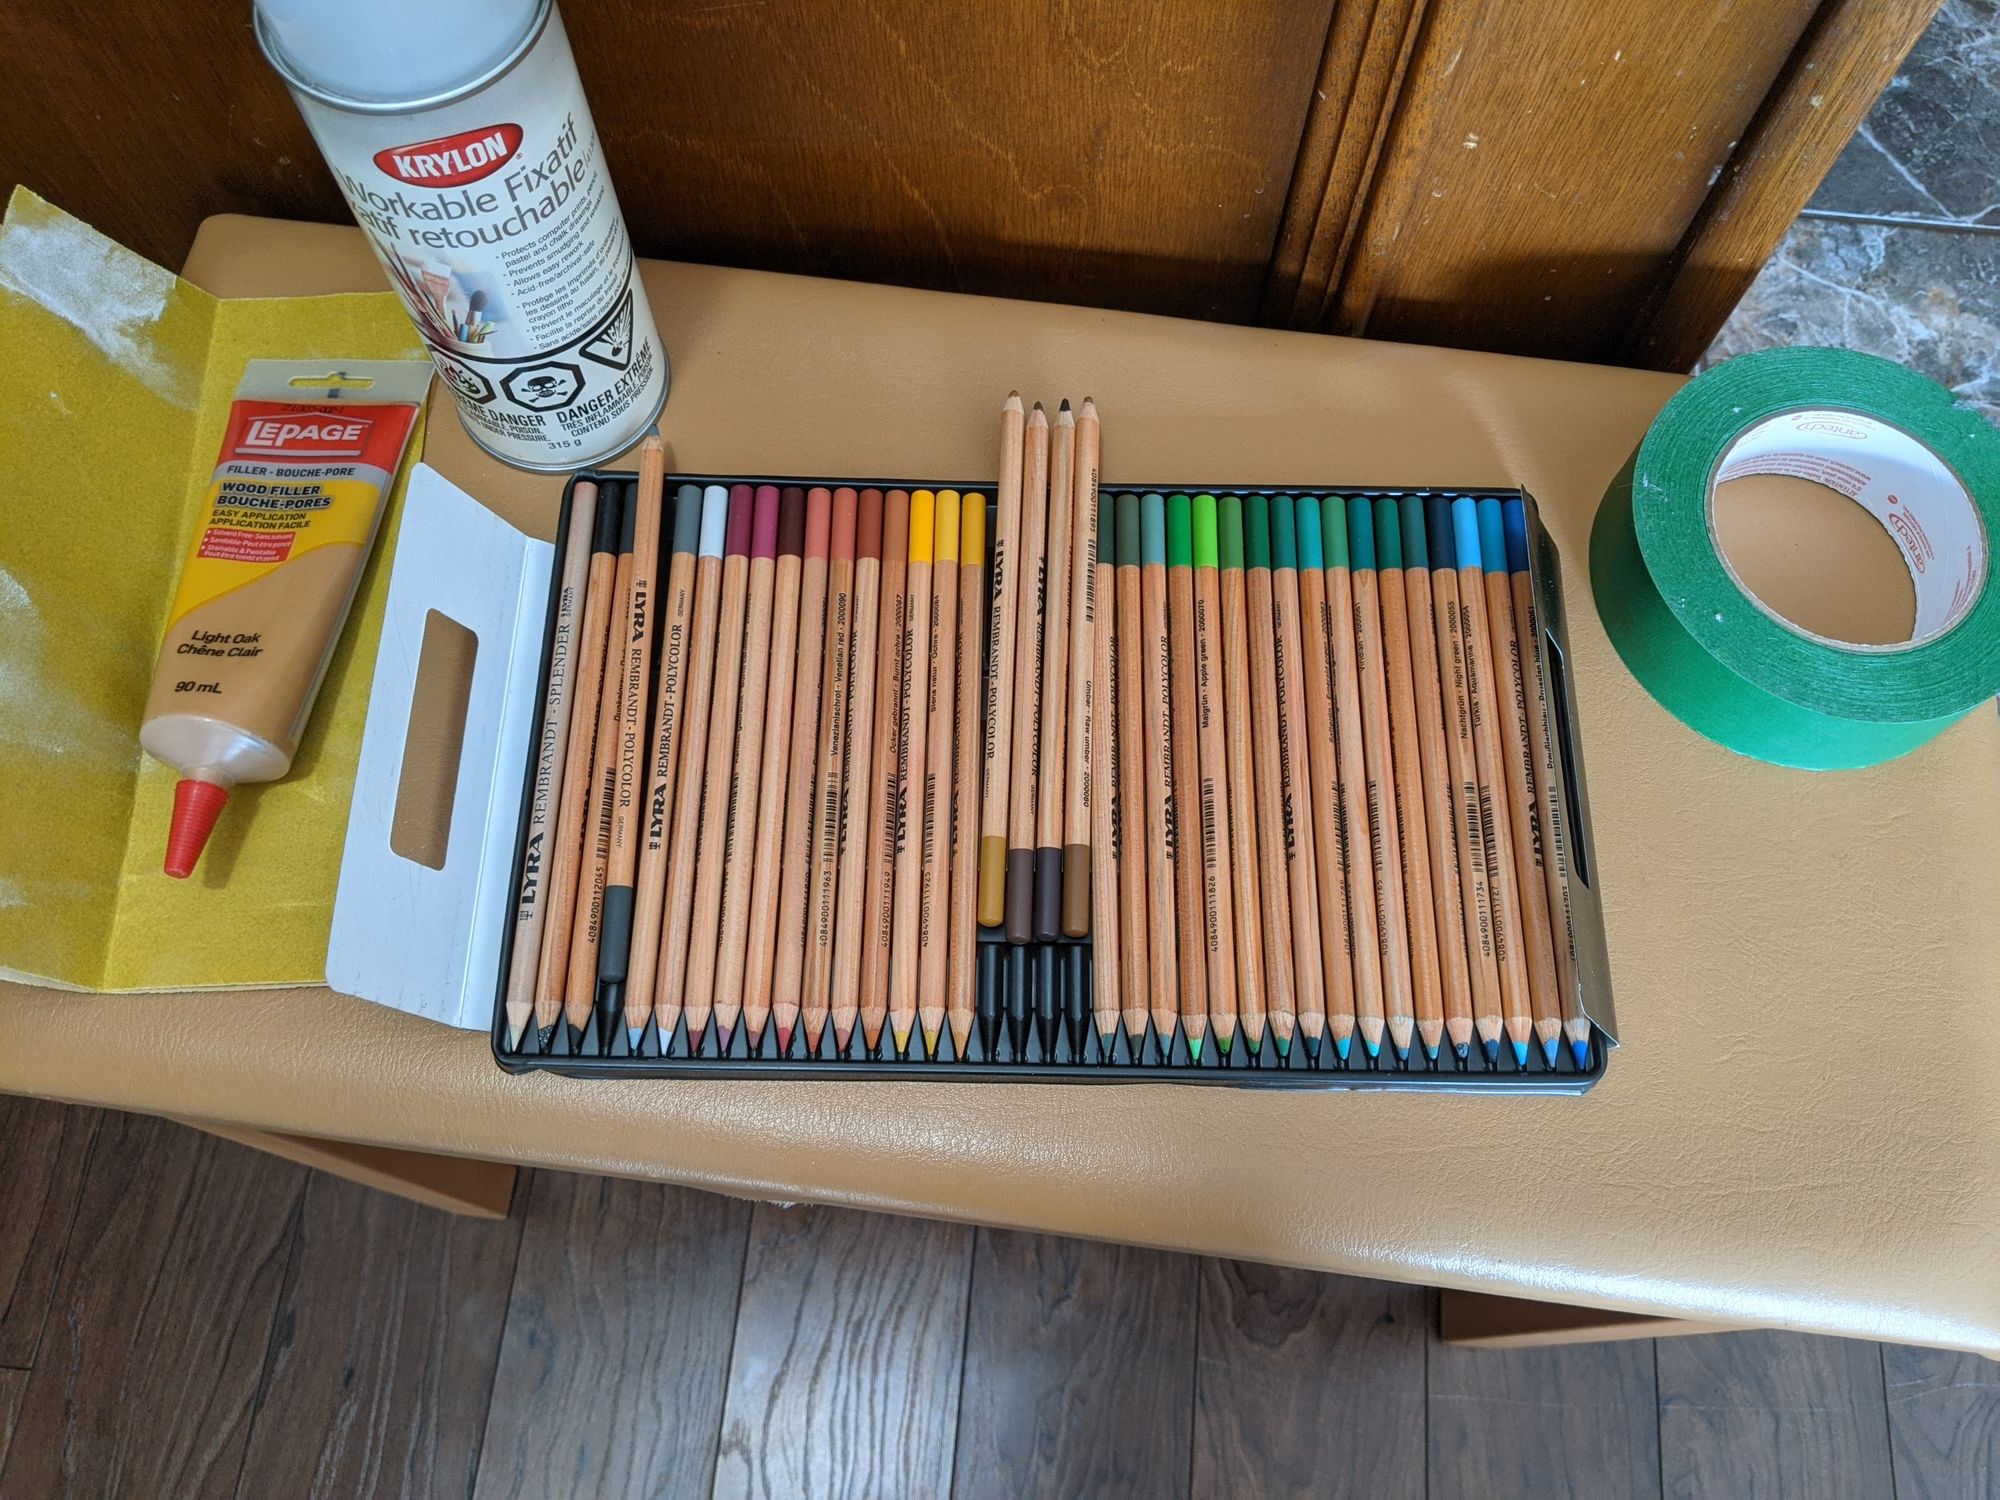
Sandpaper, wood filler, workable fixative, pencil crayons, and masking tape displayed on a piano bench.
The Execution
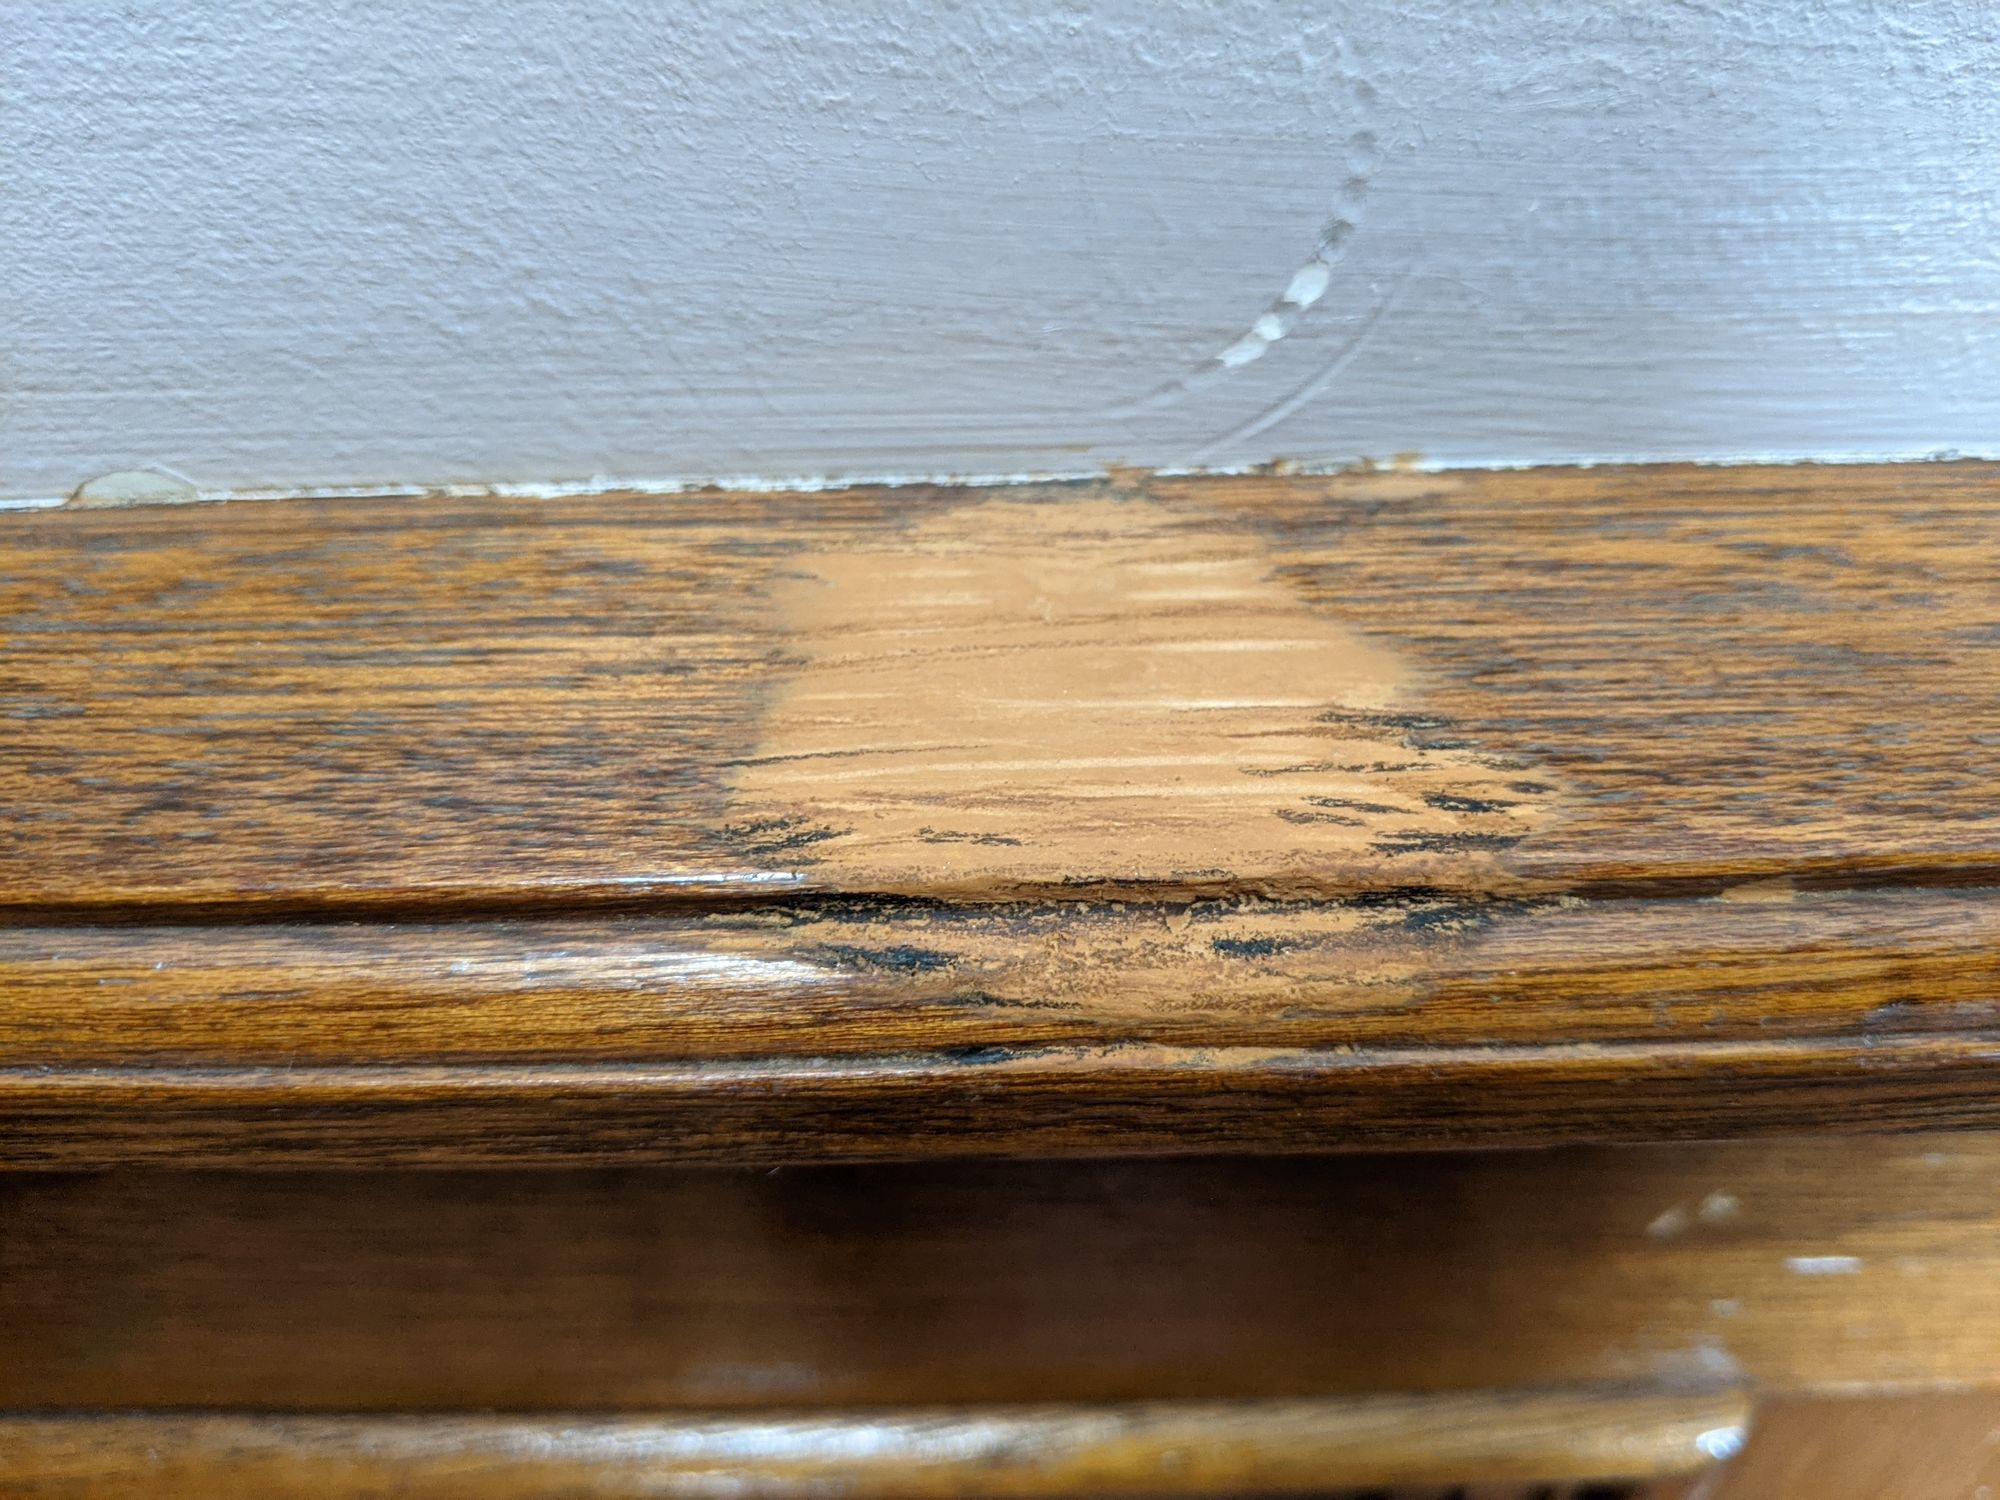
I built up layers of wood filler on the gouge caused by a door knob and missing door stopper. This was the most time-consuming part of the process. Each 2 mm layer had to dry completely before another layer was added.
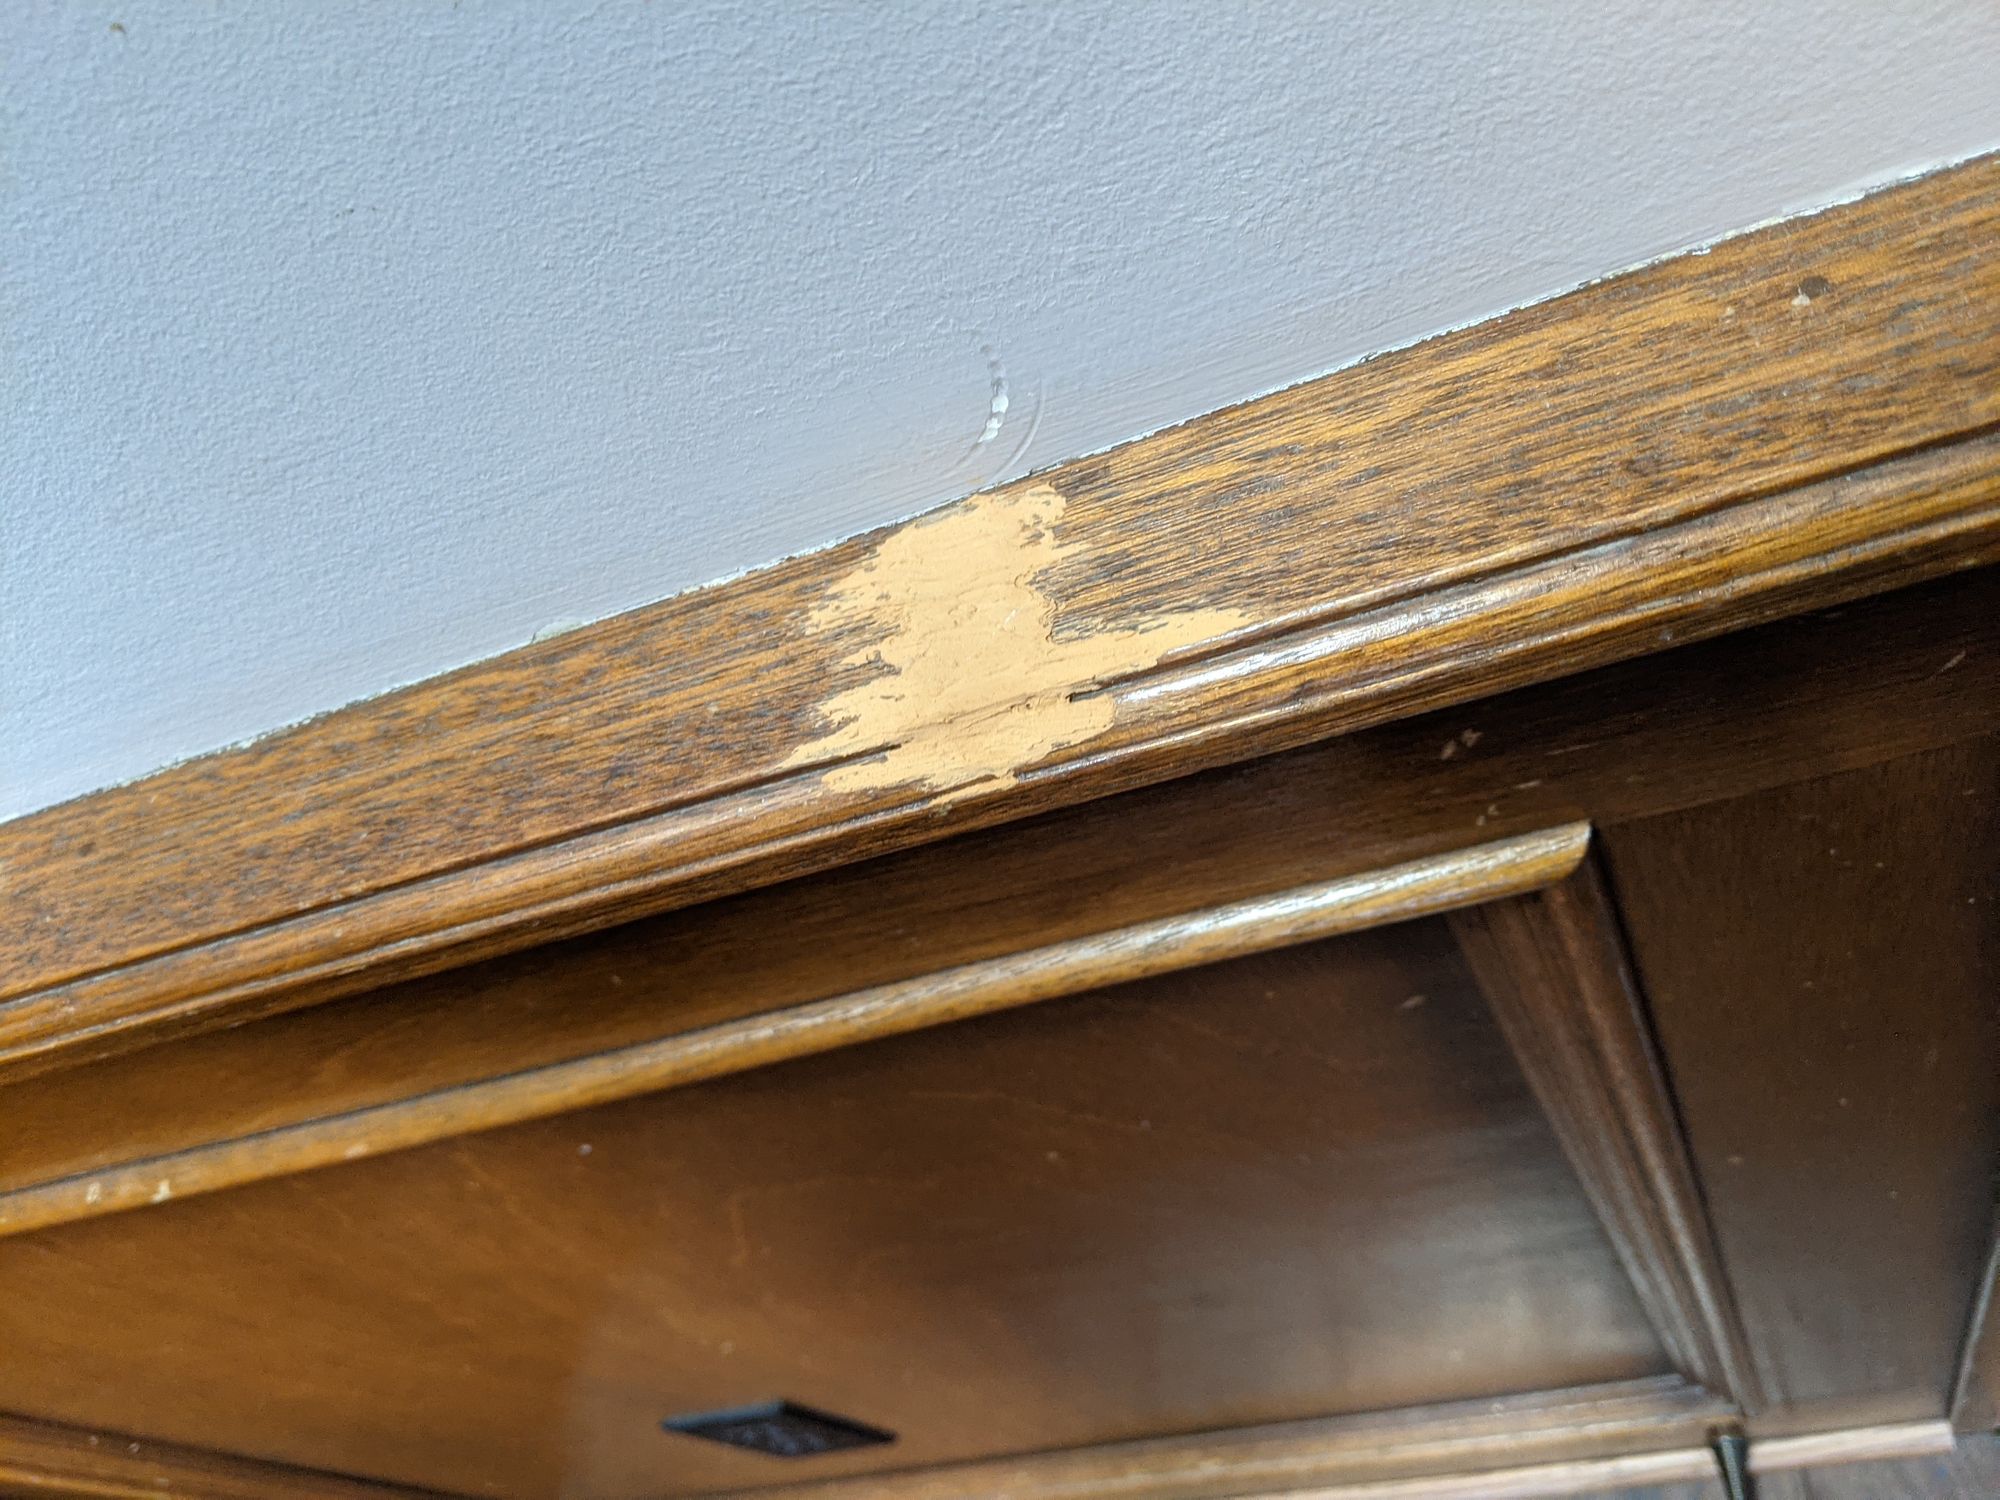
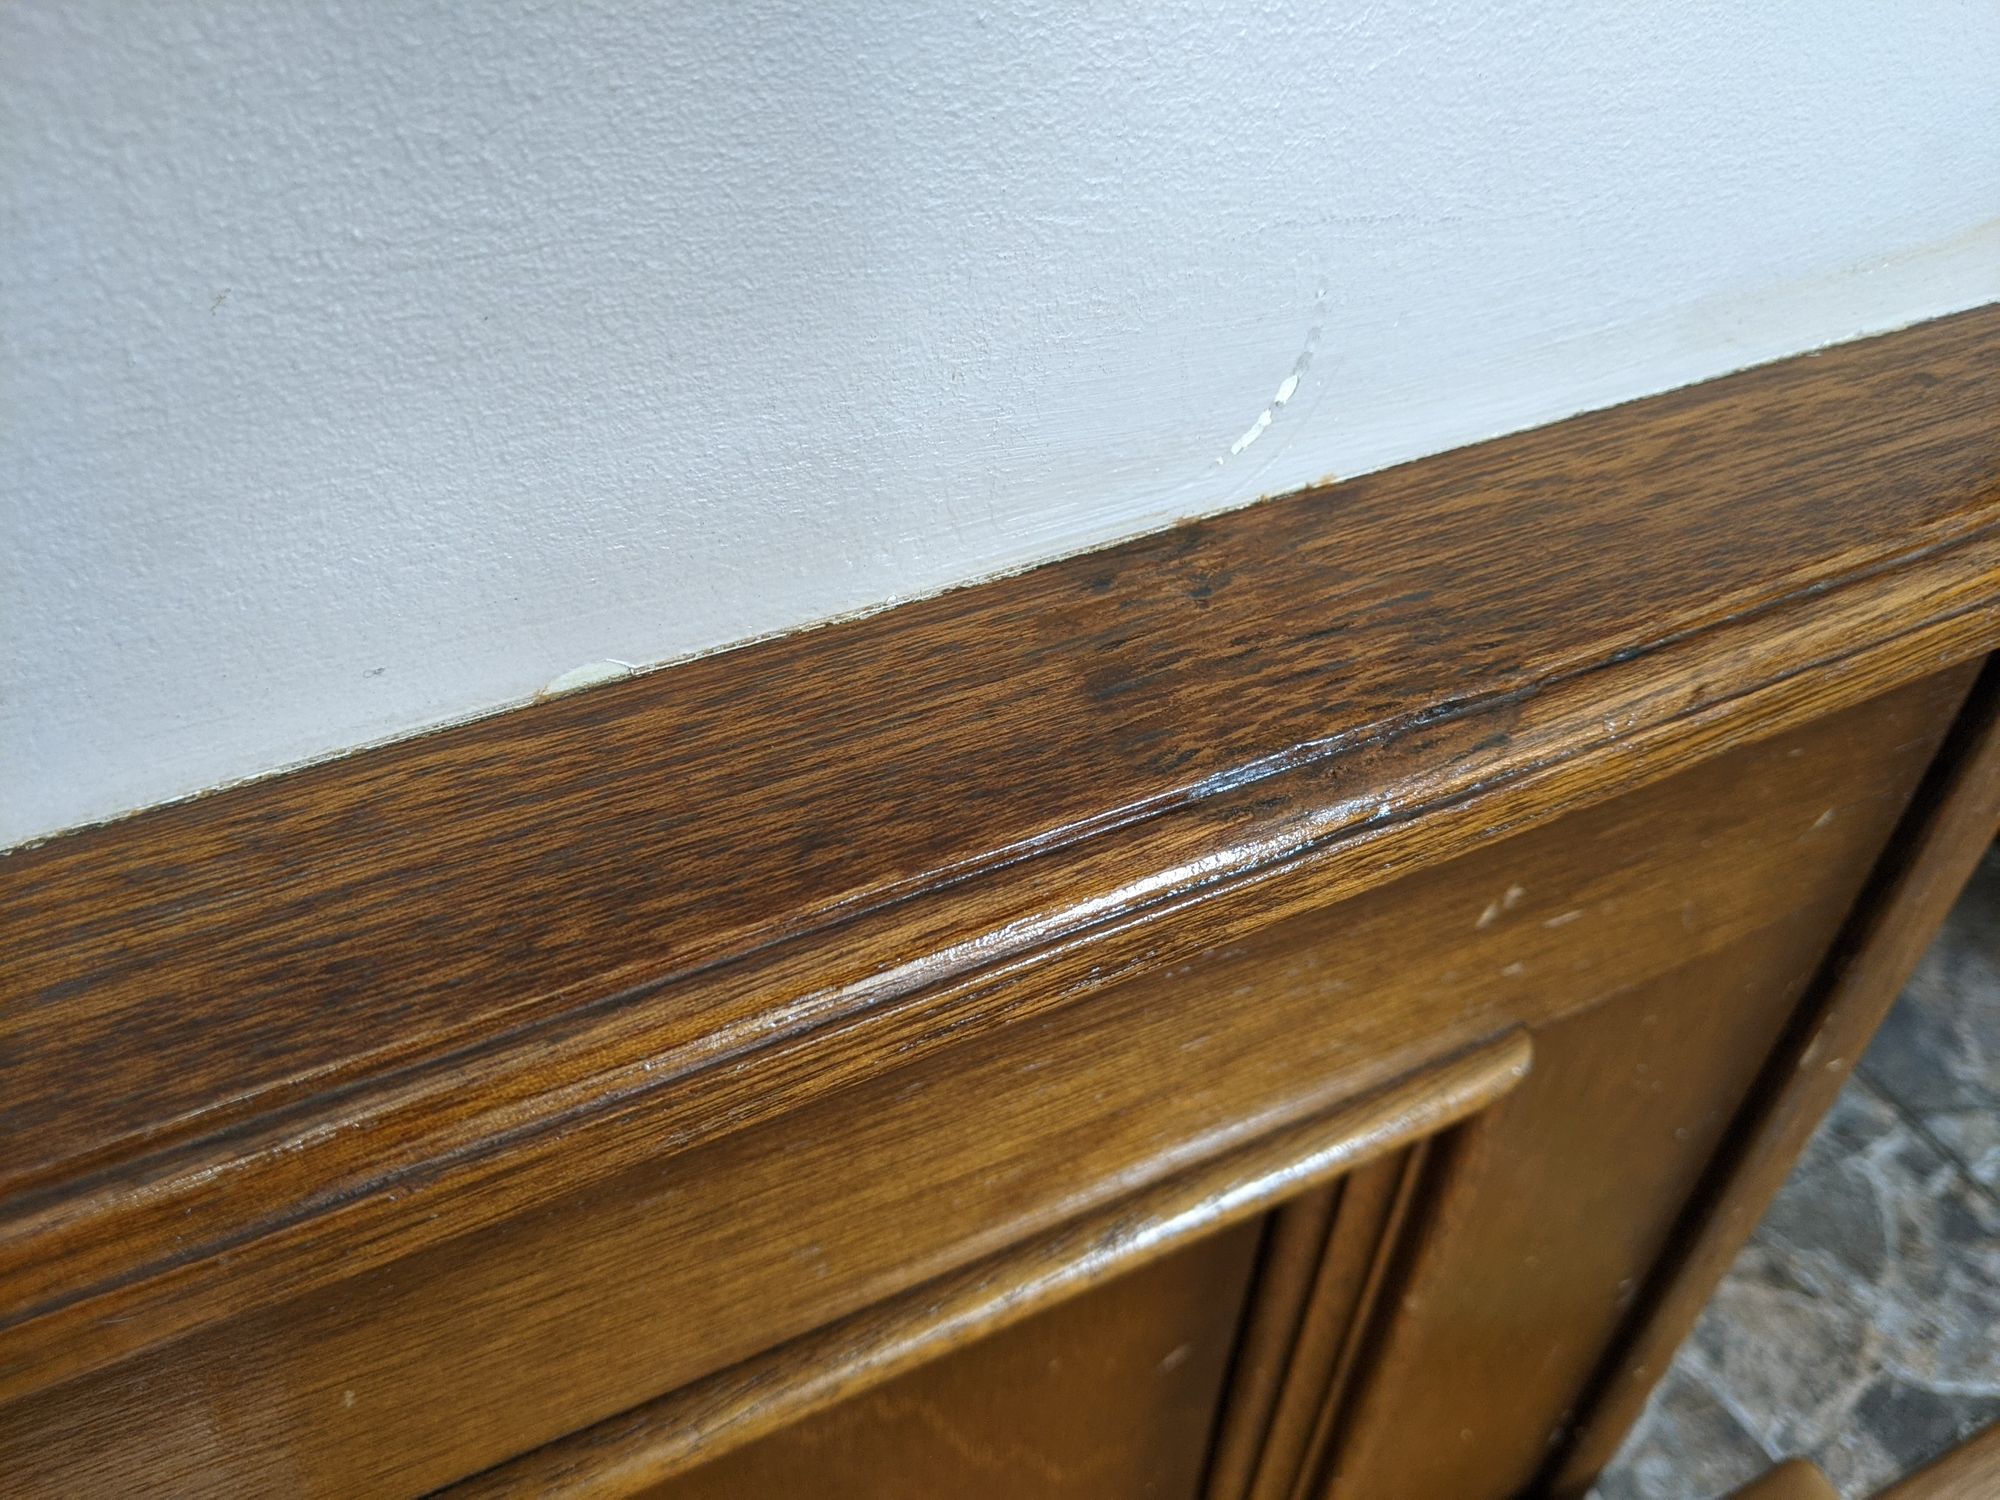
The door knob had worn a path through the wood of the dado rail and was just starting to drive itself into the dry wall. Also pictured is the door stopper to prevent this from happening again.
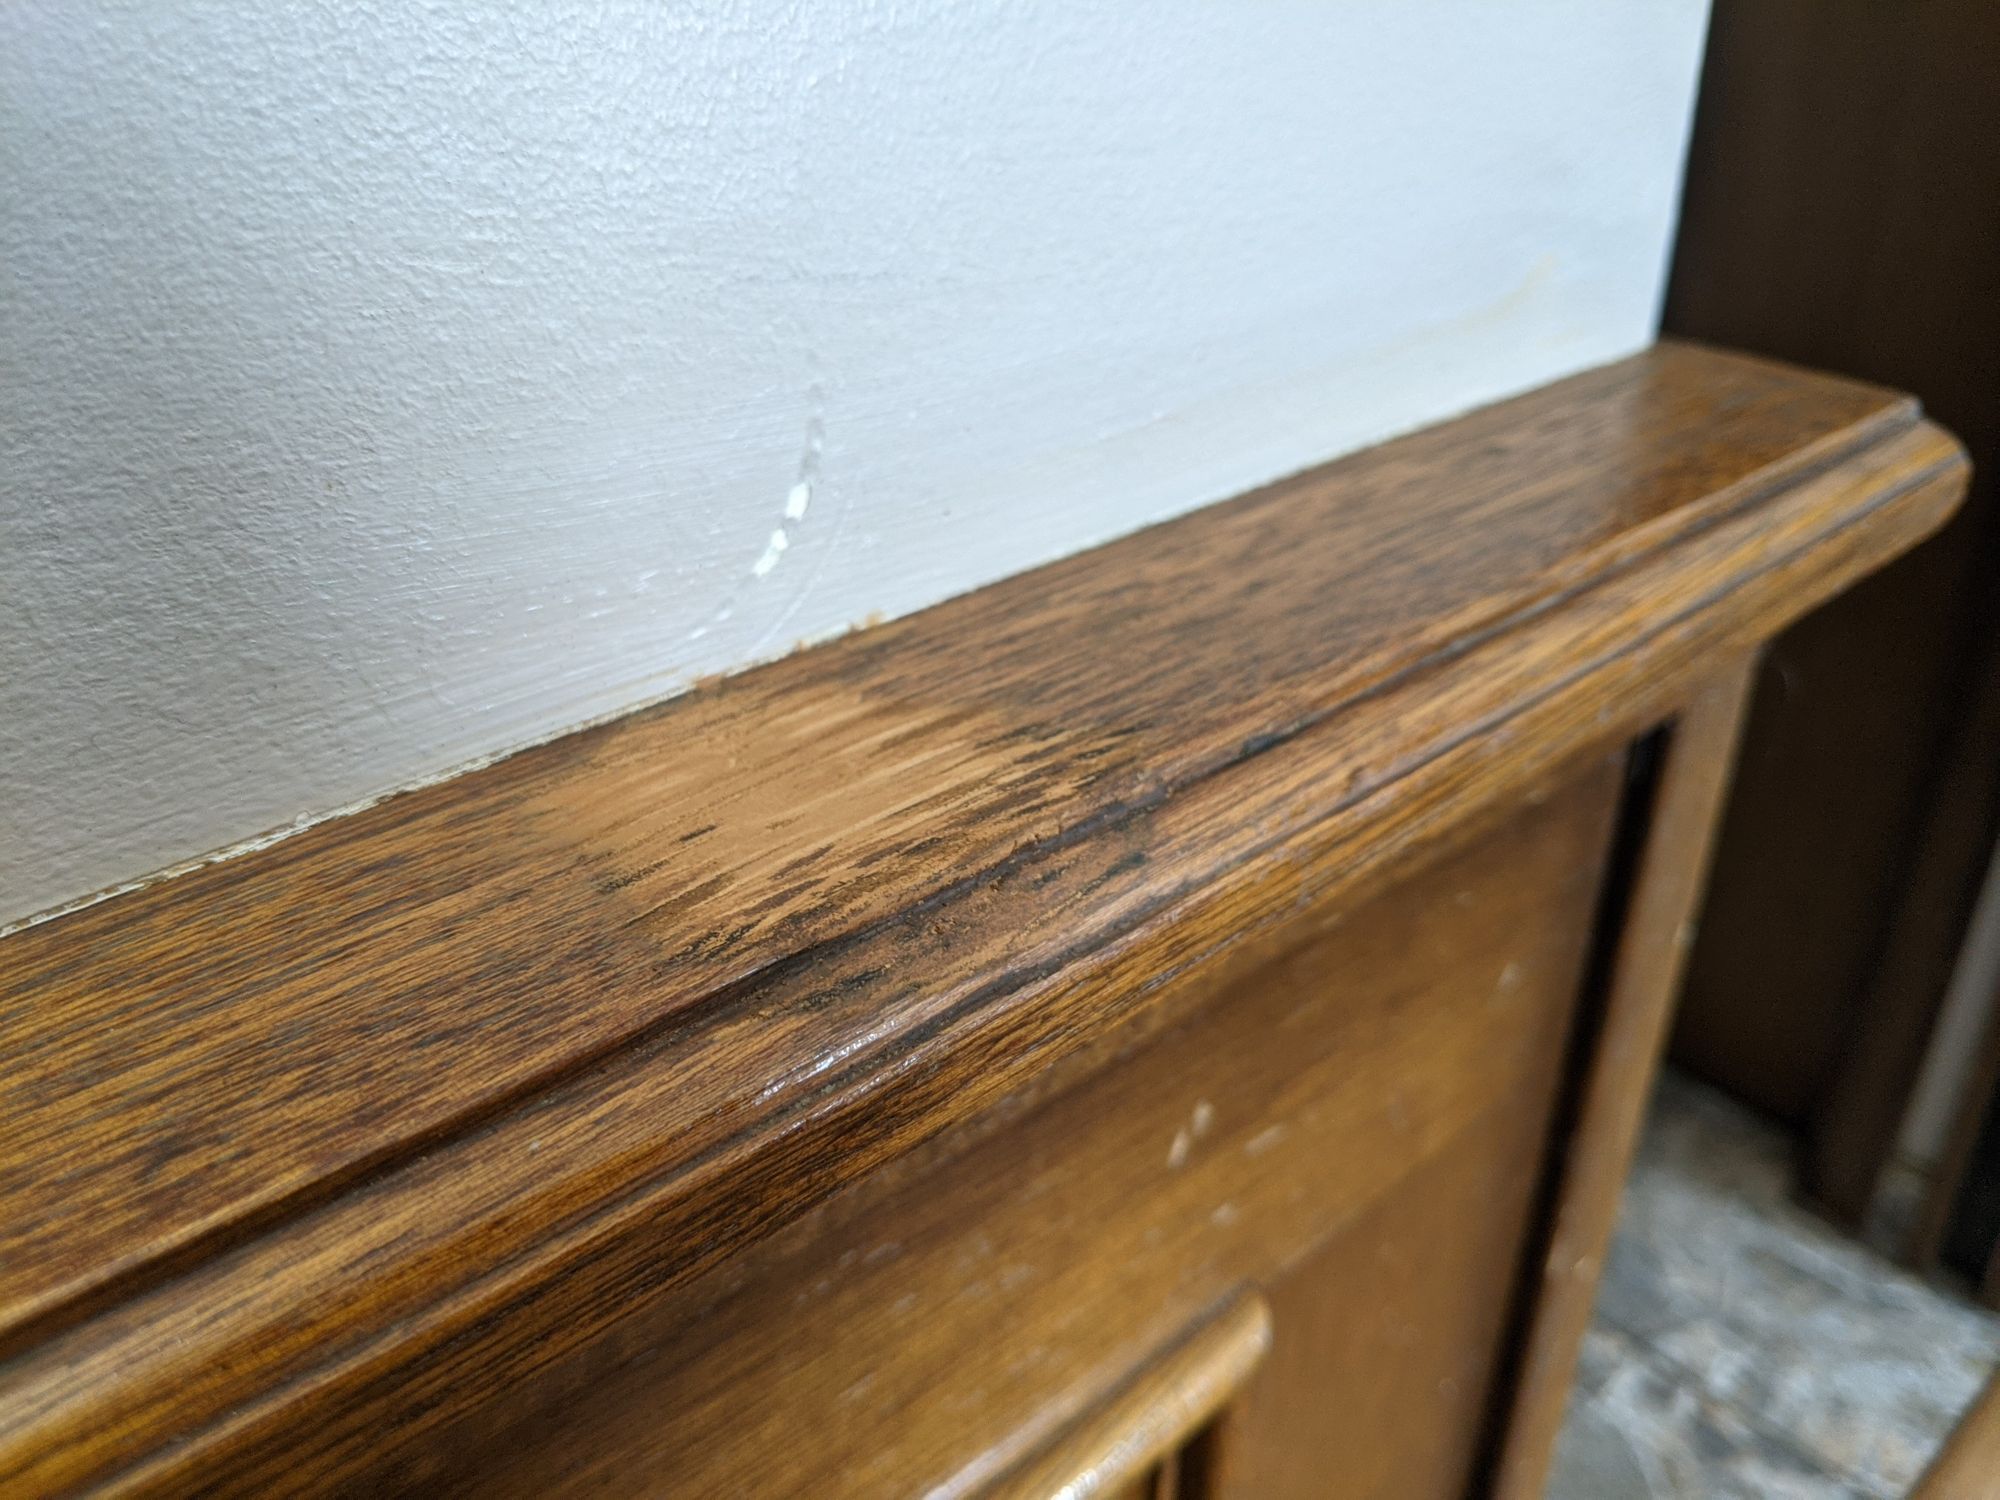
After I built up the missing wood, I had to sand the profile of the ledge into shape. Make sure to sand in one direction with the existing wood grain. I added extra grain texture by using and edge of a piece of sandpaper to etch and “draw.”
While sanding I used jojoba oil to blend the wood filler into the pre-existing wood colours. This is where having a stainable wood filler makes an incredibly marked difference.
I now had a surface that was ready for my final execution. I started to build up my layers of pencil crayon. When I needed more detail, I would spray some fixative and continue to build up the colour layers.
The quality of your pencil crayons is really important. I tested five different sets and the ones that matched my project the best in terms of quality (colour brilliance and smoothness) were Lyra Rembrandt Polycolor. None of my other sets came remotely close when it came to earth colours.
Colour matching the profiling on the ledge and drawing out the pattern.
Pattern-matching the wood-grain of the dado rail.
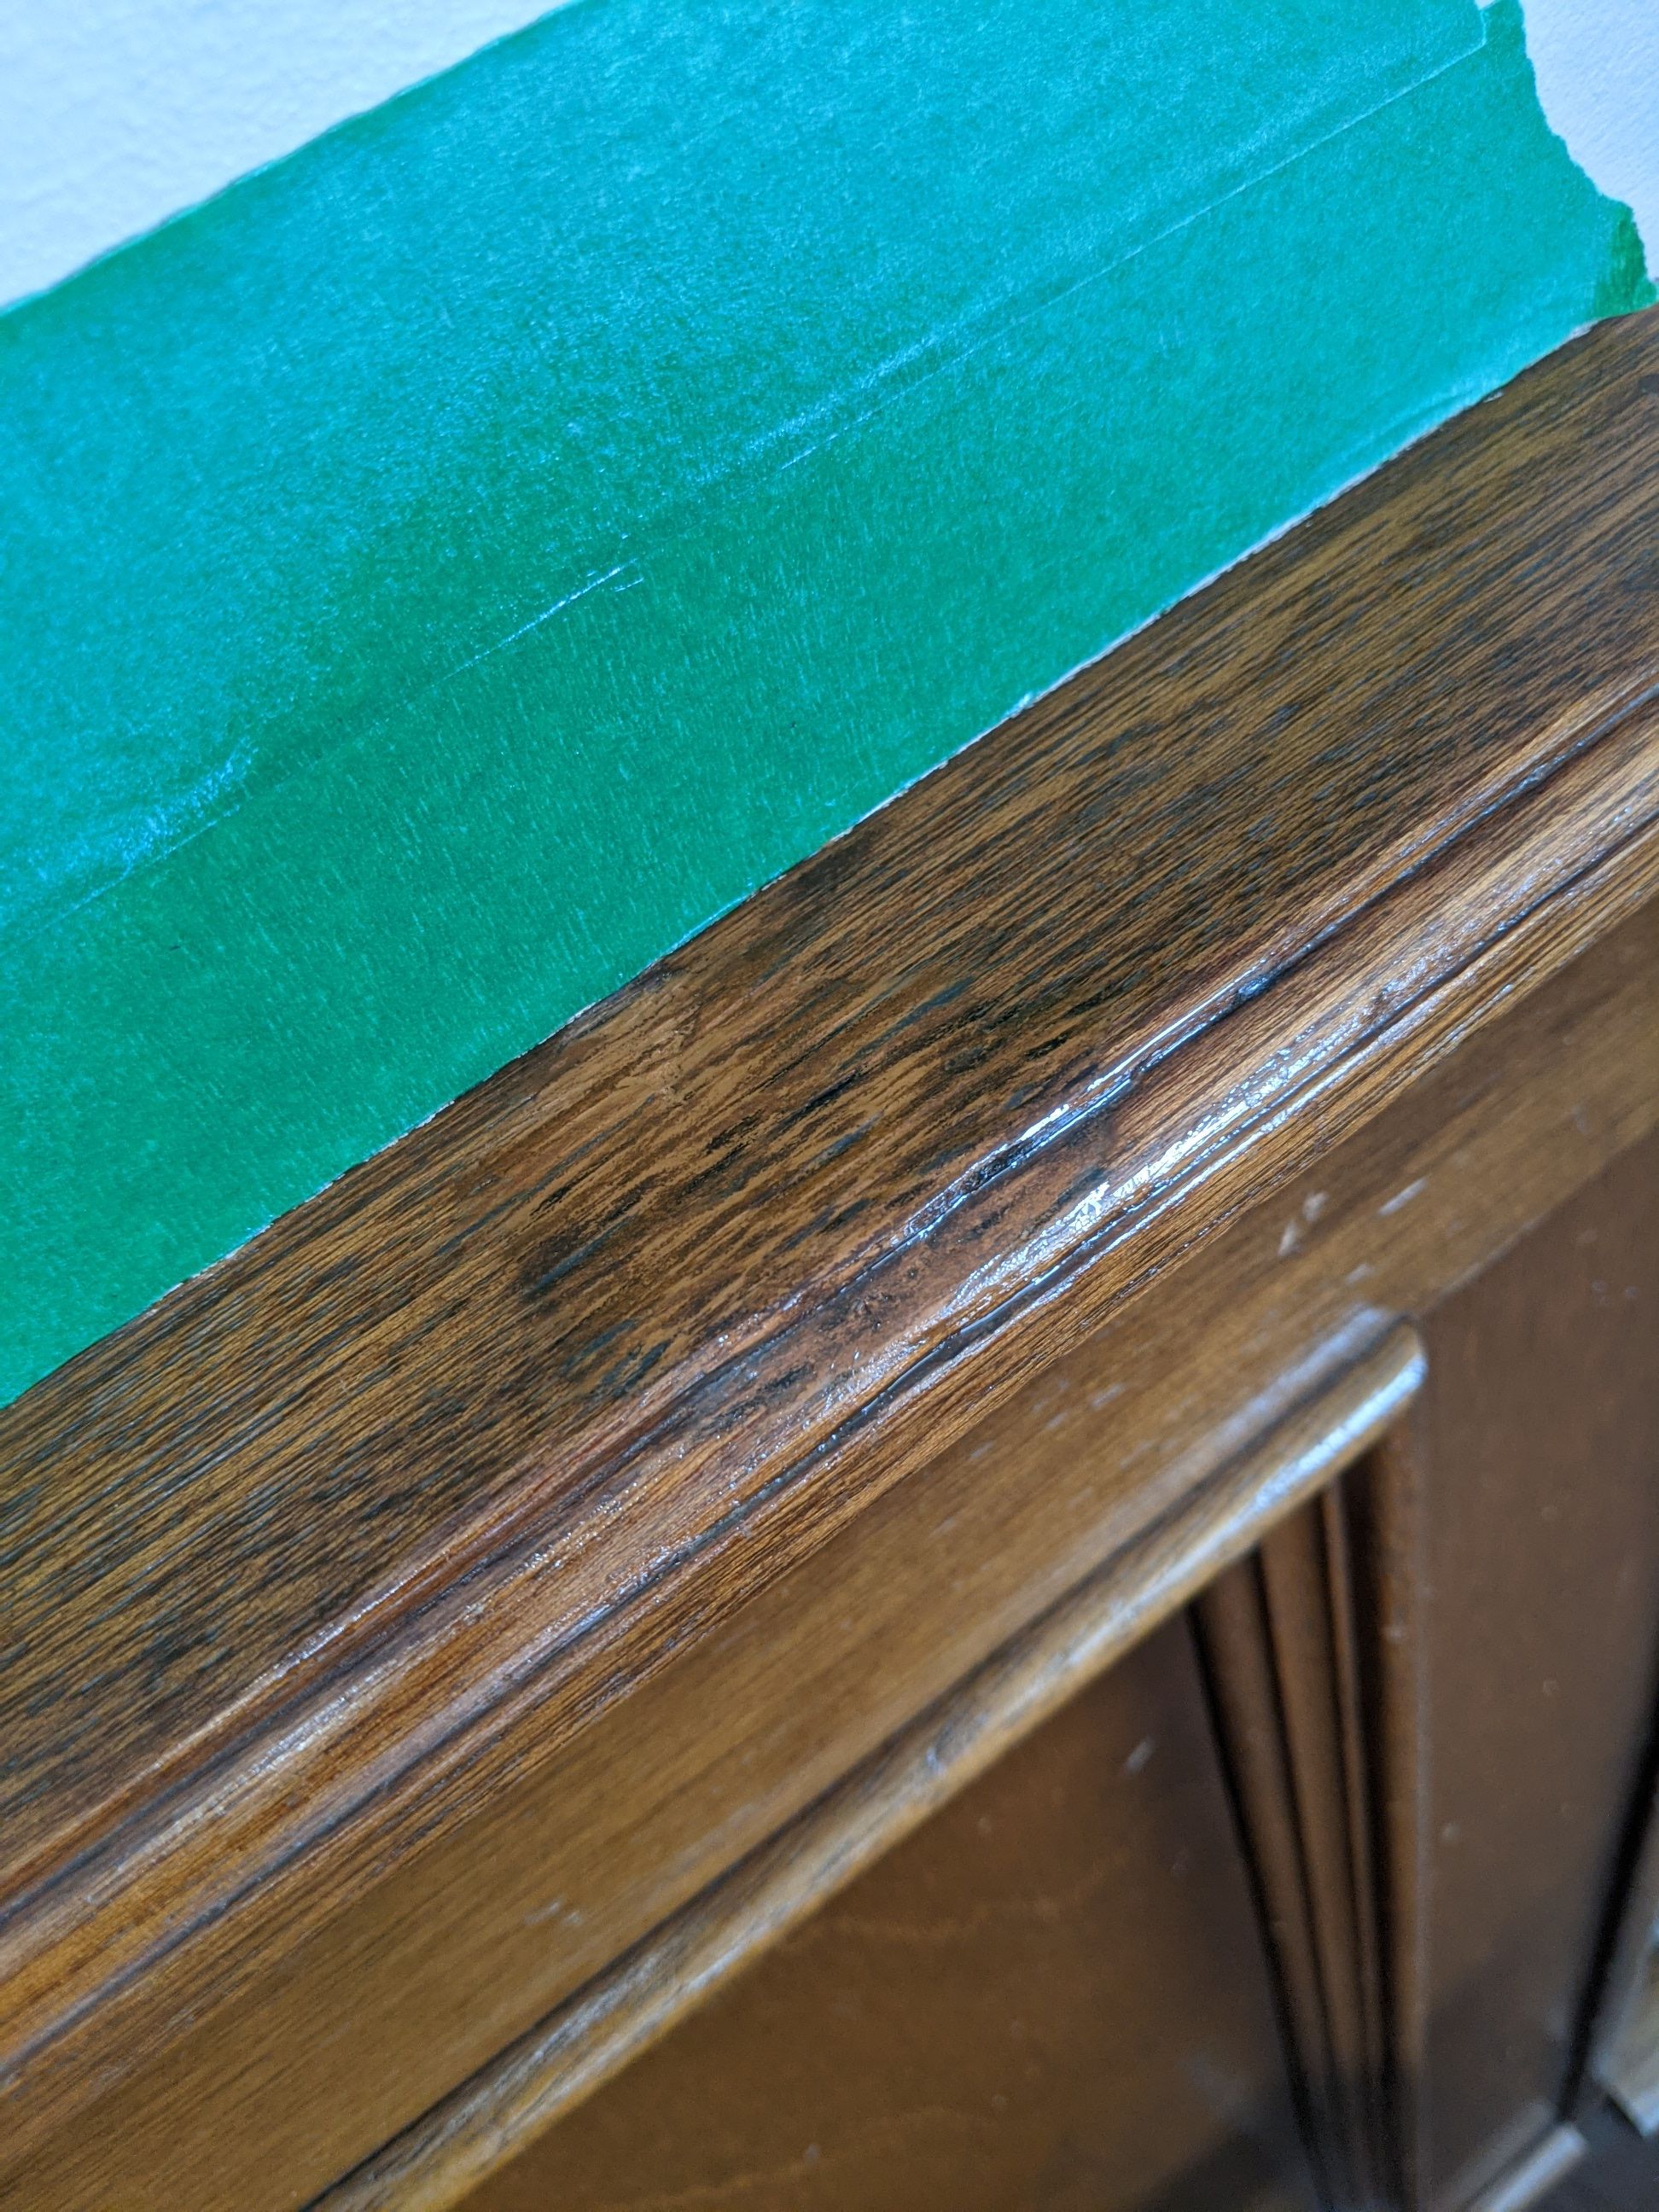
Using the spray fixative to build up working pencil crayon layers.
The Final Result
I really like how this turned out. My texturing is enough to fool my eye unless I’m actively scrutinizing the area. I could have gone in with some finer detail, but the semi-damaged and weathered look fits better than a pristine finish would.